A guide to demonstrate how to compress a video file using Prism Video Compressor
Whether you need to upload video footage online on websites, social media, email videos or need to save disk space, learning how to compress a video file without losing much quality is very useful. Prism Video Compressor can easily convert your large video files or create smaller files for email, uploading, or storage. This guide will show you how to compress video files through various methods using Prism Video Converter and Compressor Software.
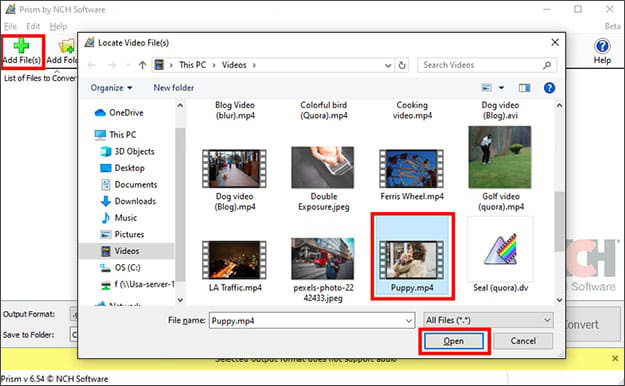
Click Add File button on the Home tab toolbar to add a video to the application. You may also click ALT+A on your keyboard or drag and drop a file or folder into the File bin.
2. Adjust Video Compression Settings
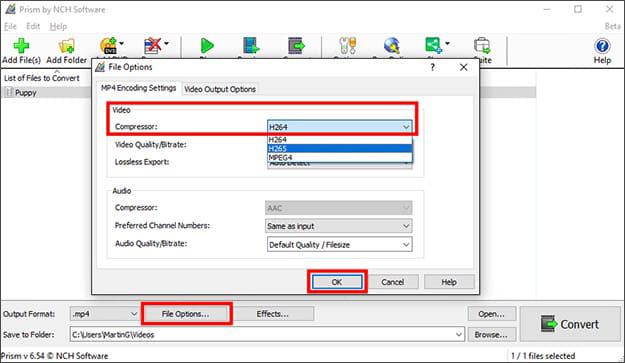
Click the File Options and click the down arrow beside Video Compressor under MP4 Encoding Settings. Select between H264 and H265 depending on your file size requirement. Click OK to save your selection.
H264 standard will compress your video file up to 50% size of MPEG-2. Through this compression, you will be able to maintain the same video quality despite using only half of the storage space. This achieves a bitrate savings of 50% or more compared to MPEG-2.
H265 is the successor to the widely used H.264. H.265 offers 25% to 50% better data compression at the same level of video quality.
Note: The Output Format used in this tutorial is the same as the format of the original file.
3. Reduce Video Quality/Bitrate
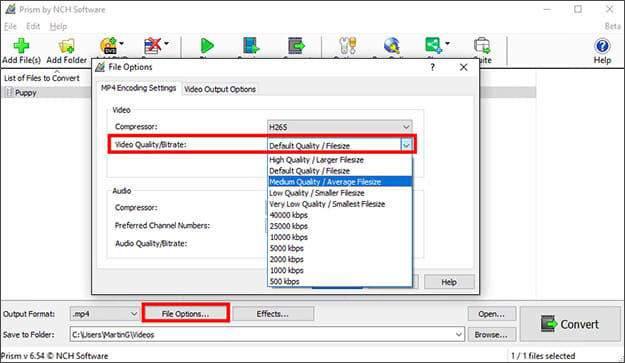
Another way to reduce your Video File size is by reducing Video Quality/Bitrate. Click File Options and click the down arrow beside Video Quality/Bitrate under MP4 Encoding Settings.
Change the video bitrates to a lower kbps value. The bitrate affects the file size of your video output as well as its resolution quality. The lower the bitrate, the smaller the file size but the output quality will also be lowered. You can also select your desired Video Quality and Filesize. Click OK to save your changes.
4. Resize Video Dimensions
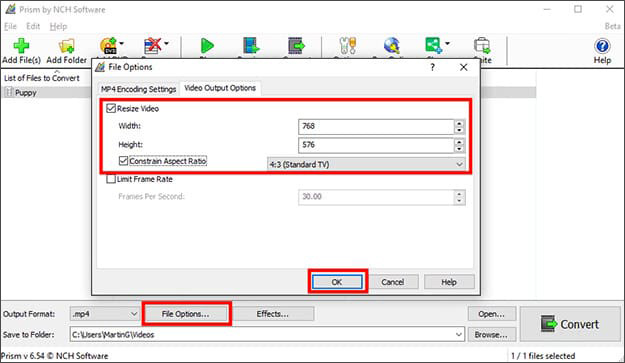
Resizing the video dimensions can also reduce the video file size. Click the Video Output Options tab under File Options and check the Resize Video checkbox. Enter a smaller width and height to achieve a smaller file size. Check the Constrain Proportions checkbox to avoid distortion. Click OK to save your selection.
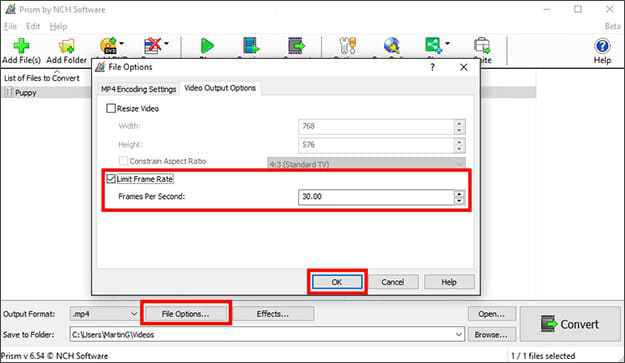
5. Reduce Video Frame Rate
Reduce Frame Rate to reduce video file size. Check Limit Frame Rate under Video Output Options. Use the up and down arrow to adjust the frames per second. The lower the Frame Rate, the smaller the File Size. Lowering the frame rate of your video to 15 or 10 fps can reduce the file size by as much as 200% or 300%. You may want to experiment to find the lowest acceptable frame rate of your video file. Click OK to save your changes.
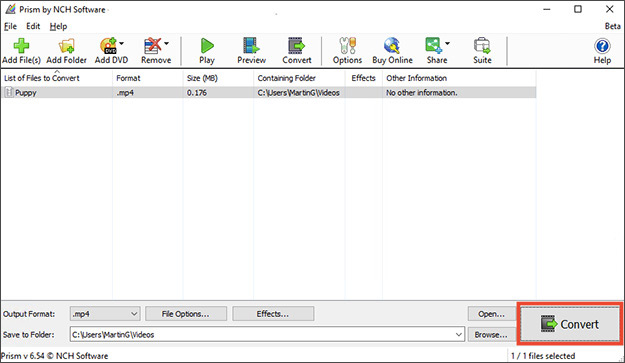
6. Convert Video Files and Save
Once you are finished, click the Convert button and save your compressed video file to your desired folder.
Pro Tip: Convert the video to .flv or .mp4 video formats as they both have smaller file video sizes. Review the Other Links section in the guide below as each file format has its own Encoder Options to help reduce the video file size.