Begin by downloading and installing PhotoPad Photo Editor. Once the software is installed, add the image file(s) you want to convert. Click the “Add Files” button on the toolbar and browse to your files or drag and drop them from a folder on your computer directly into the image list in PhotoPad.
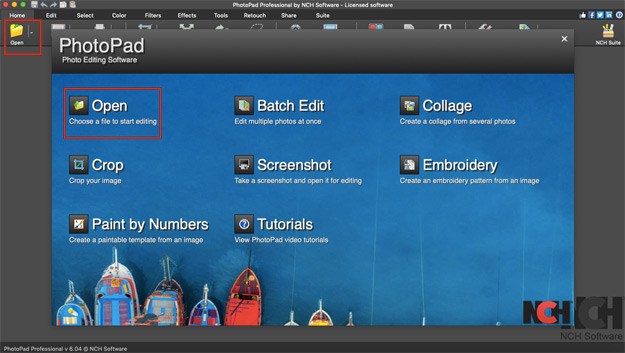
Add a file by clicking Open on either the start screen or the Home toolbar. You may also click CTRL +O or drag and drop a file or folder into the program.
Note: Select Batch Edit if you want to edit multiple photos at once.
Crop your photo to bring more focus on the subject. The crop tool is located in both the Home Tab and the Edit Tab. After clicking the Crop button on the home toolbar, the Crop options will appear in the Effects and Layers panel located on the right side of the window. The crop widget will appear over your photo. Hover over the border of the default crop selection. When the mouse becomes a double-sided arrow, click and drag to adjust the crop size. You can move the crop by placing the mouse in the center of the crop, then click and drag to your desired location.
In the Crop tools, select from a list of common Aspect Ratios from the dropdown menu. Select the radio button next to Portrait or Landscape to change the orientation. If you need to crop to a specific size, select your units, then enter the width and height. Select the Keep Aspect Ratio checkbox to maintain proportions. When this is selected, the width will automatically update when you edit the height and vice versa.
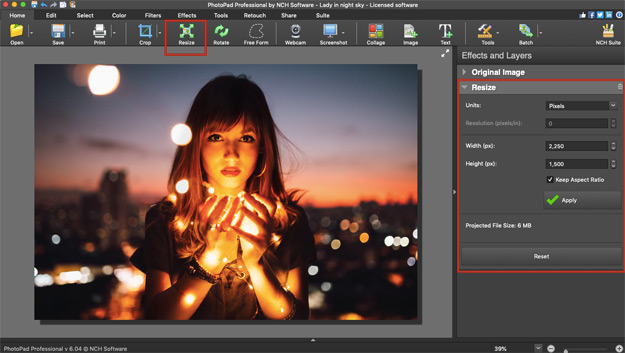
To resize your image to a specific output size, use the Resize button located on the home toolbar.
We recommend selecting the Keep Aspect Ratio checkbox to avoid distorting your image. When Keep Aspect Ratio is selected, the image will maintain its original proportions. When it is deselected, the image may warp depending on the dimensions you enter. Use the Units drop-down menu to make adjustments in pixels, inches, millimeters or percentages. When you are making adjustments in millimeters or inches, you also have the option to adjust the resolution.
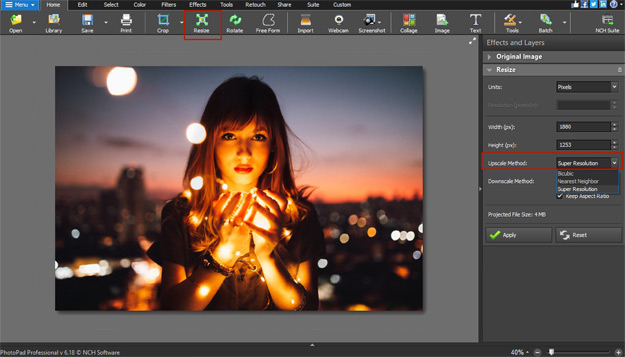
Use Super Resolution to upscale your photos to maintain the highest quality with our AI machine learning algorithm. Select Super Resolution from the Upscale Method drop-down menu, and click Apply.
Note: The recommended photo resolution is 300 pixels/in. For the web, 72 pixels/in is the standard.
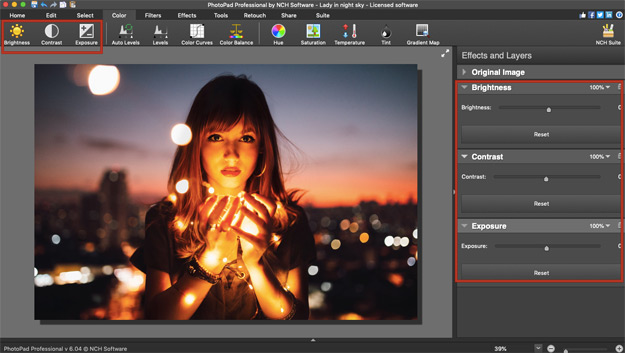
Sometimes photos turn out either too bright or too dark. The Color tab has several tools to help you perfectly adjust your photo. Brightness, Contrast and Exposure are located on the left side of the toolbar and are a good place to start when editing your image. Use the slider to make your adjustments. Click Reset to revert to the original image.
Use the Brightness slider to brighten or darken the image.
Negative values will darken the image.
Positive values will brighten the image.
Use the Contrast slider to increase or decrease the contrast of an image.
Negative values will gray out the photograph.
Positive values will accentuate the difference between shadows and light areas.
Use the Exposure slider to correct over or underexposure.
Negative values will simulate a reduced light to film exposure duration. This makes the image darker.
Positive values will simulate an increased light to film exposure duration. This makes the image brighter.
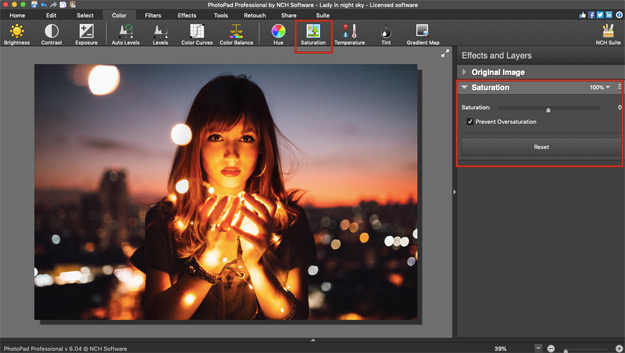
The Saturation tool is on the Color tab. Increase saturation of the photo to make colors more intense and decrease saturation to tone down the colors. Move the slider to the right to increase saturation and move it to the left to decrease saturation. You can always click Reset to return to your original image. Use the Prevent Oversaturation checkbox to prevent saturation artifacts.
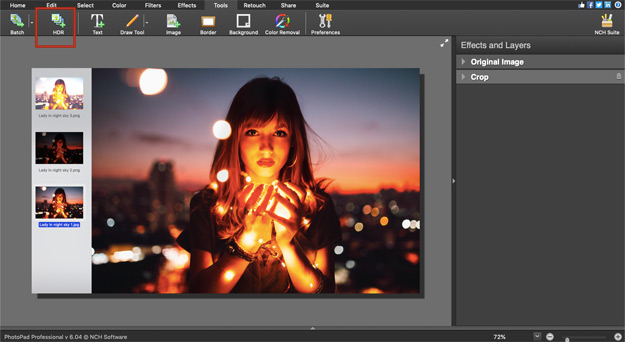
Combine three exposures into one HDR Image to get the perfect exposure in your highlights, mid-tones, and shadows. PhotoPad’s algorithm combines your images into the best version with minimal effort from you. Find the HDR tool on the left side of the Tools tab.
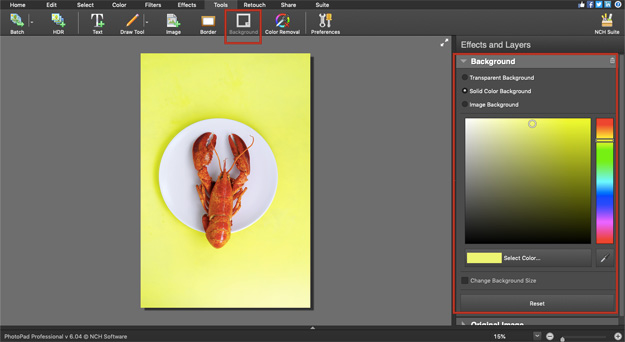
Replace the background of your photo to simplify the image, add a prettier sky or add a creative flair. The Background tool is located on the Tools tab. Select Transparent Background, Solid Color Background or Image Background from the radio buttons by clicking next to the option you want.
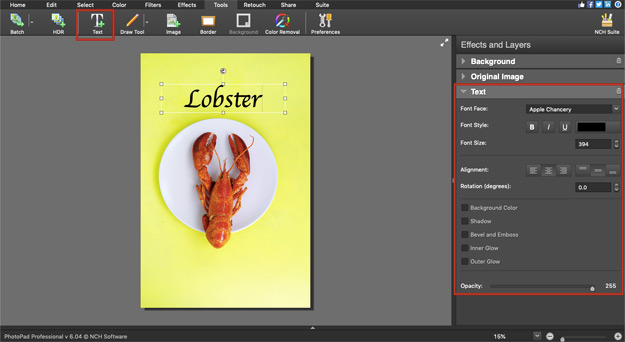
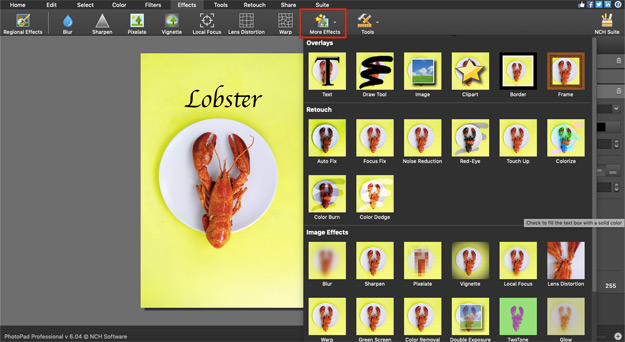
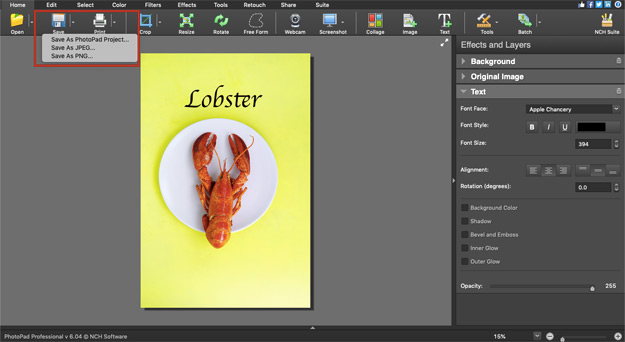
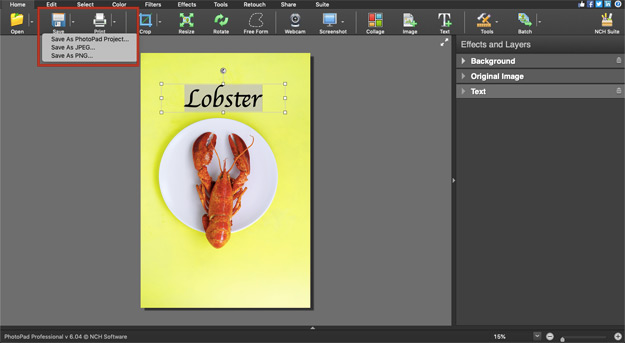
Add Text to your images using the Text tool. The Text tool and Curved Text tool is located on the Tools tab. You are able to click and drag to position your text on your photo. Easily edit the font style, size, color and more.
Adding text to your photos is easy. Our text tool contains many font and customization options. Click the Text button on the Tools tab and the text options will appear in the Effects and Layers panel on the right. The text box will appear on your photo. Use your keyboard to type directly into the text box. Reposition the text box by moving the mouse outside of the textbox. When it becomes a four-sided arrow, click and drag to the new location.
Resize the text box by hovering over the border of the text box. When the mouse becomes a double arrow, click and drag to resize. Rotate the text by clicking and dragging the curved arrow at the top of the text box or type your desired degree of rotation in the rotation field in the text options layer. You may change the font style, color, size, alignment, add text effects or adjust the opacity in the text options layer.
Add additional text layers by clicking the Text button on the Tools tab or Home tab.
Explore all of the tabs to find additional effects, filters and tools. Image Overlay, Vignette, Blur, Touch Up, and Grayscale are just a few of the creative tools available.
Once you are finished editing your photo, make sure to click the Save button on the home tab to save your changes. This will overwrite your original image. To keep your original file, click the arrow next to the Save button and select one of the Save As options. Save your photo as a PhotoPad project if you want to continue editing later. This gives you the ability to make more edits in the Effects and Layers panel. Save to jpg or png to share your file with others or to print your image.