How to Resize a Picture in PhotoPad

A guide to demonstrate how to resize a picture in PhotoPad

There may be times when you encounter a website with size requirements on images you want to upload or perhaps you just need your image to fit somewhere that it is too large for. Learning how to resize a picture is easy with PhotoPad Photo Editing Software.

Download PhotoPad Photo Editing Software

Download Now

  1. Download and install PhotoPad Photo Editing Software and launch the program on your computer.
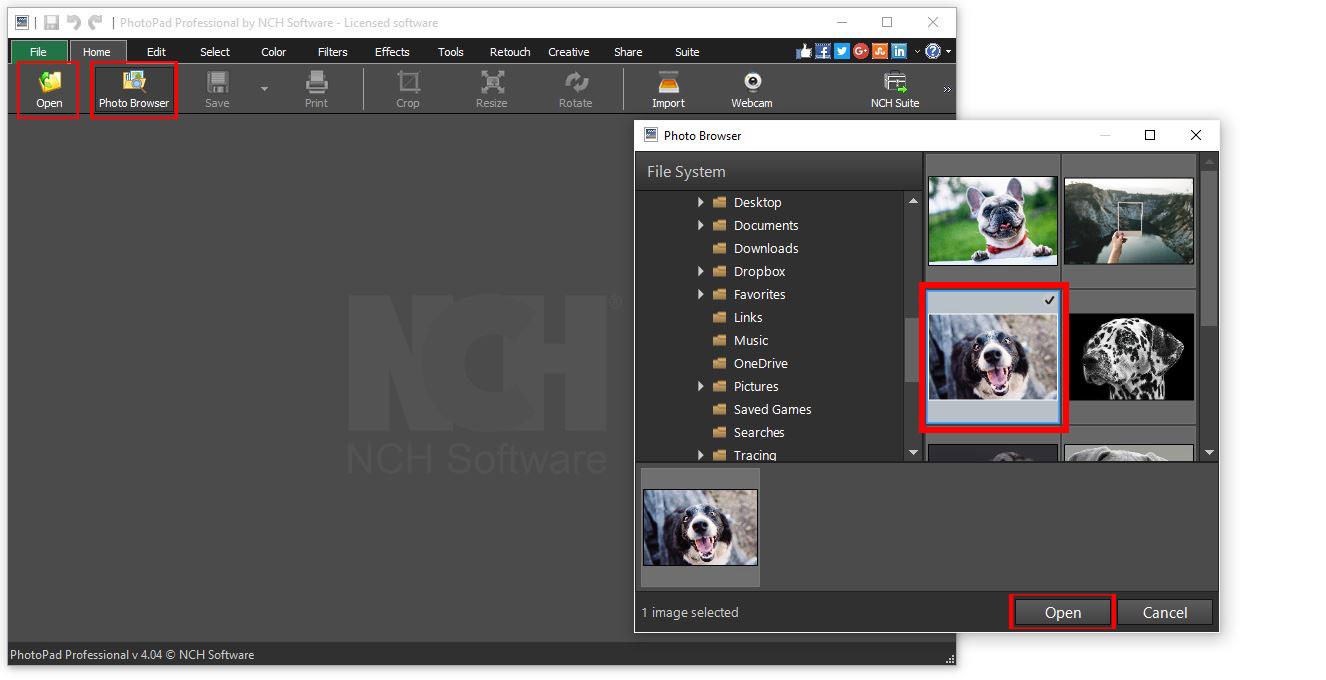
  2. Import your image into PhotoPad by clicking the using the Photo Browser or by selecting the Open Files option under the home tab
  3. Opening image files into Photopad
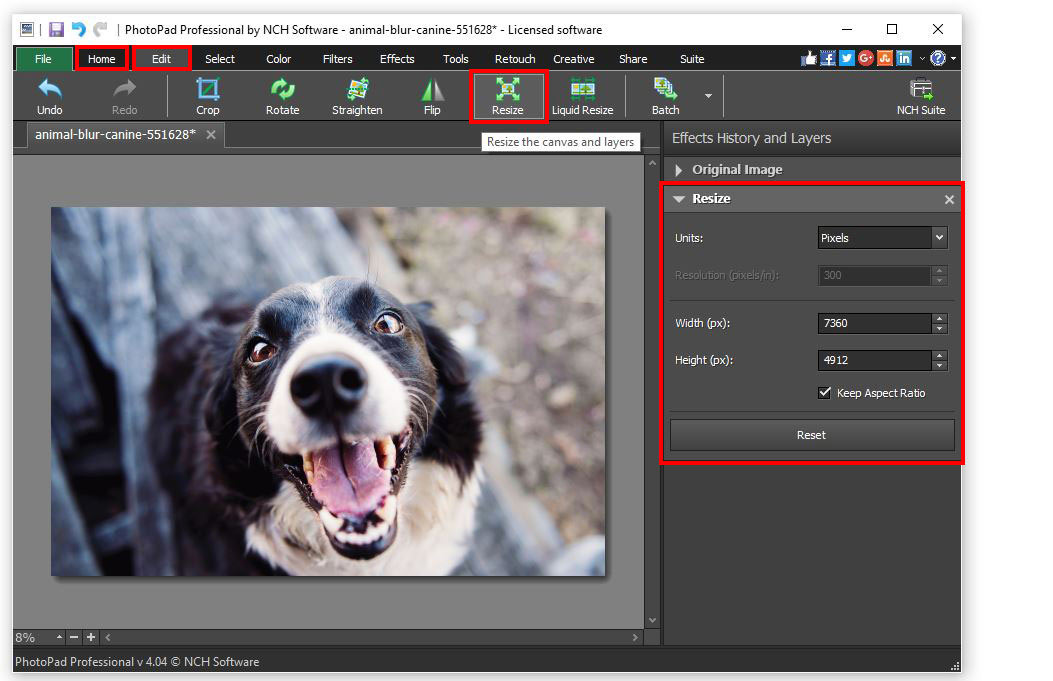
  4. Click on the Resize icon, which is located under both the Home and the Edit tabs, to open the resize layer in the Effects History and Layers panel. How to resize a picture
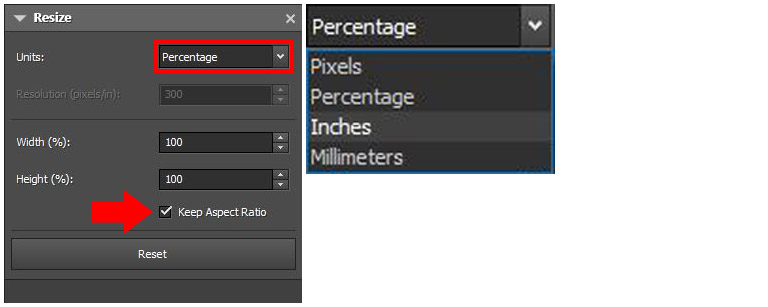
  5. Select the units you wish to use for resizing your picture. You can resize by Pixels, Percentage, Inches, or Millimeters. Make sure that the box is checked to Keep Aspect Ratio, unless you have an image that will not be effected by distorting the proportions.
  6. Selecting units for resizing a picture
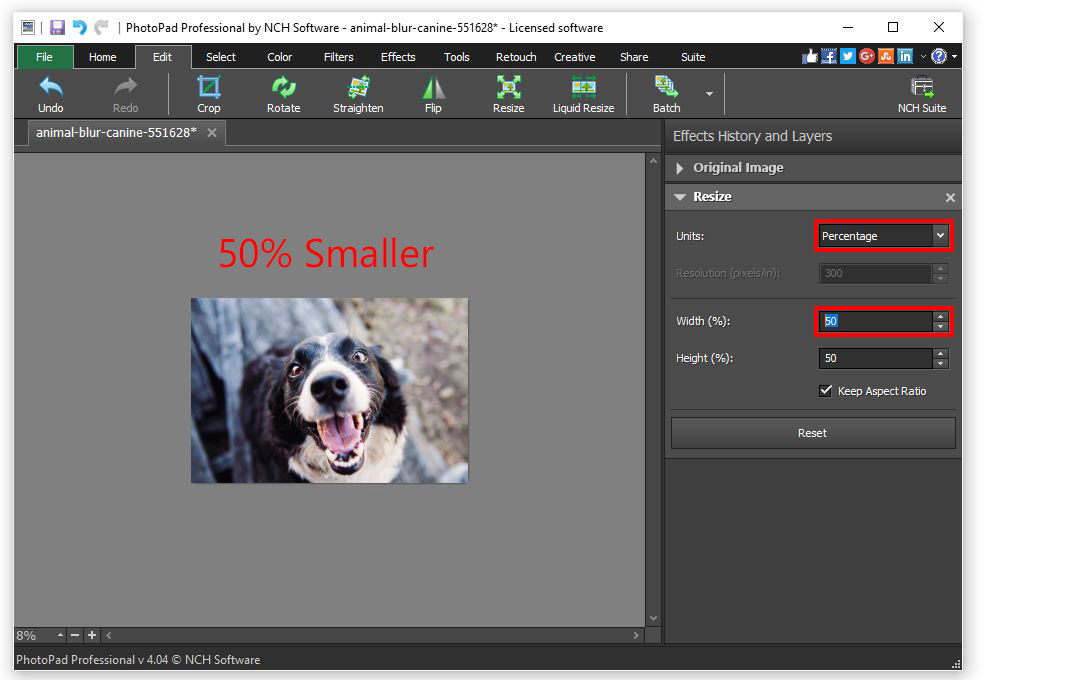
  7. With your units selected, you can now type in the numerical value in the width and height boxes beneath. If you keep the aspect ratio, you will only have to adjust one of the values and the other value will change accordingly.
  8. Resizing a picture by percentage
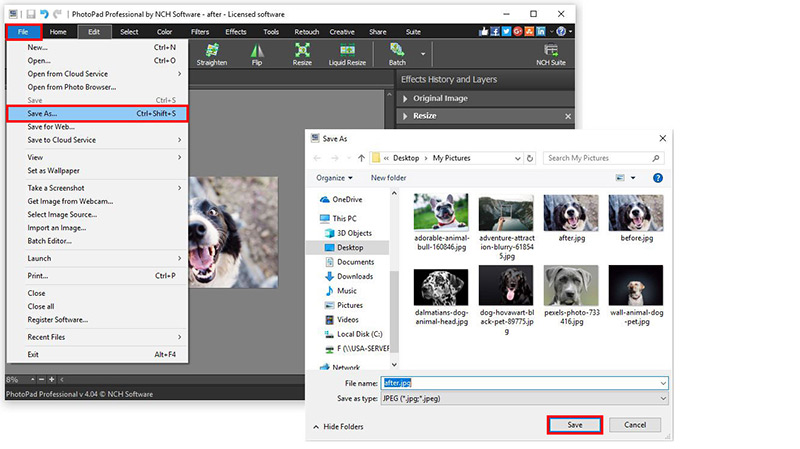
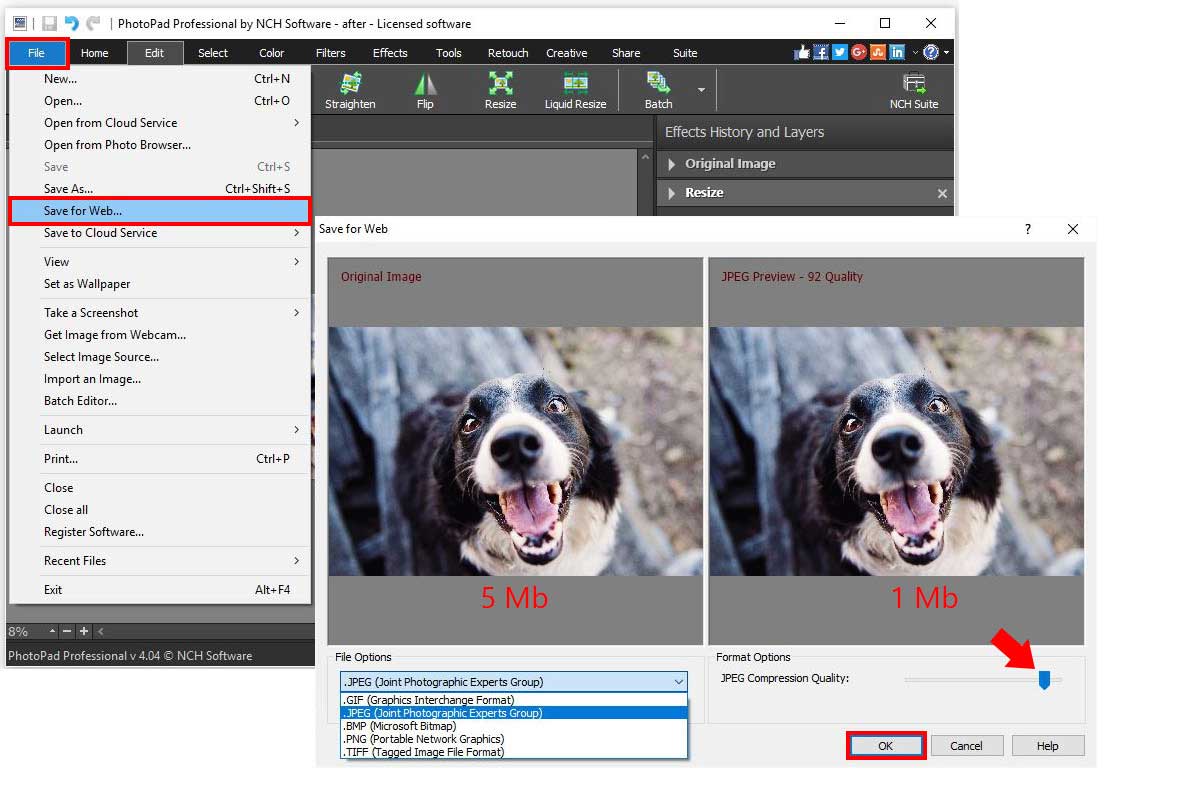
  9. Once you are finished resizing your picture, you can now save your newly resized image. Go to the File tab and select the option that says Save As... This will launch the file explorer window and allow you to set your file output type and your desired file output destination.
  10. Save your resized picture


Like what you see?

Download PhotoPad here:

Download Now

Simply download and install PhotoPad to begin resizing your pictures.

Download PhotoPad